
VVB Sensors: How to send raw vibration data into the cloud
Note: This article is for advanced users. For most vibration monitoring use cases, the data from sensors connected via CloudRails’ Plug&Play approach is fully sufficient.
Talking about vibration data and sensors is always tricky because this is such a complex topic. Therefore, this article will give a quick introduction to the different options available to consume vibration data and dive deeper into a specific use-case: extracting raw vibration data and sending it to the cloud. We currently support three different ways to consume vibration data: 1/ IO-Link vibration sensors that output pre-calculated values like friction, acceleration, crest, and others, 2/ complex vibration evaluation units (for instance the VSE units from ifm), or 3/ raw vibration data coming from some of the IO-Link vibration sensors. Let’s take a closer look at the three different options.
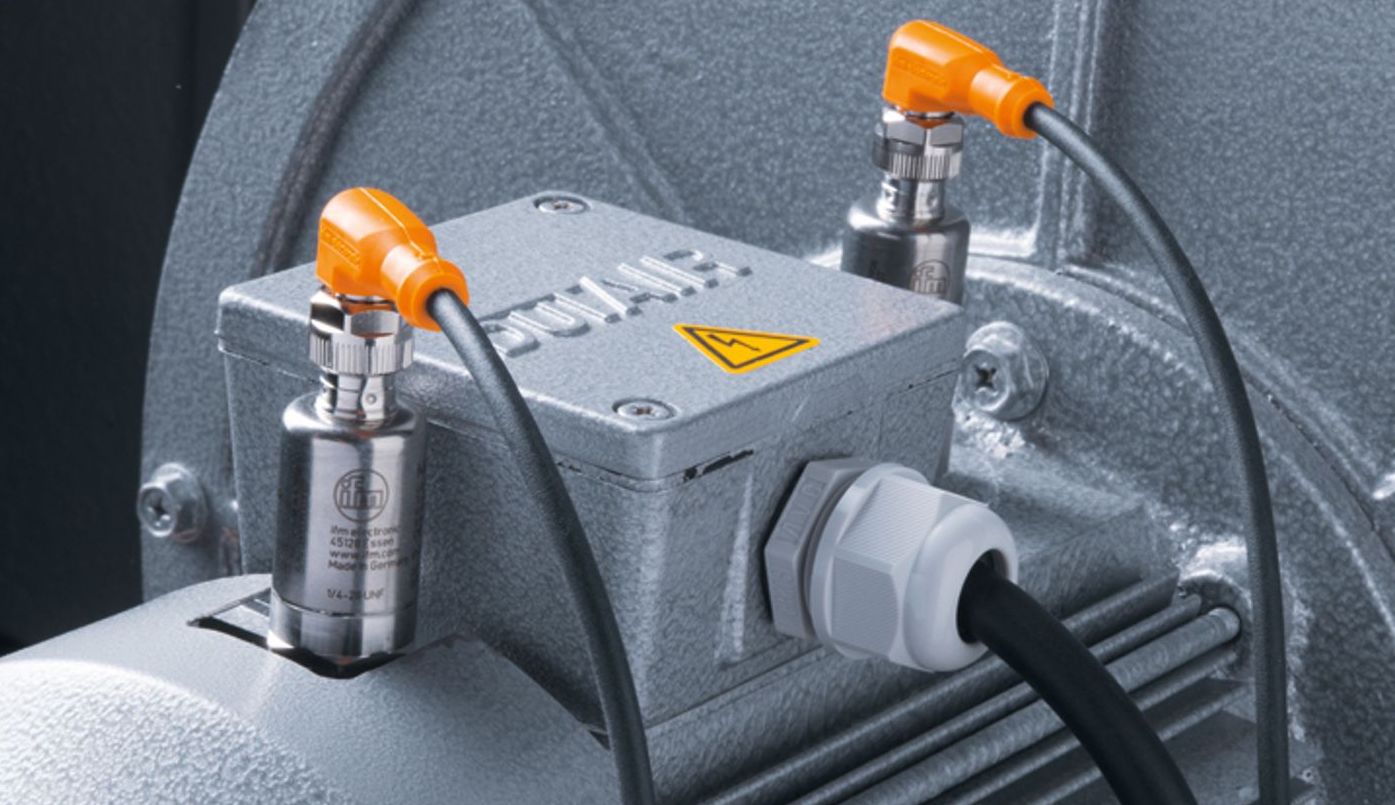
IO-Link Sensors: These are low-cost/low-effort devices – compared to the VSE units – that come preconfigured for the most common types of motors and are usually used to measure vibration for most types of equipment. They are able to monitor assets for imbalance, rolling-element bearing, or gear state by providing pre-calculated values for acceleration, friction, fatigue, crest, and a few others. A common sensor we often recommend is the VVB001 from ifm. For the vast majority of condition monitoring or even predictive maintenance use cases, the pre-calculated values are sufficient, especially over a longer period of time.
Vibration evaluation units: As mentioned above, one of the examples here are the VSE units from ifm. They can be configured to properly monitor any machine or asset and usually work with up to four vibration sensors and additional analog sensors, like temperature. However, the configuration alone requires a lot of domain knowledge and effort to get right which makes this solution feasible only for more expensive equipment.
Raw vibration data: The raw values can be helpful in case you are developing an application where you already have the knowledge to analyze the data using your own algorithms locally or in the cloud. This might further be helpful when you want to verify certain conditions indicated by the pre-calculated data set. The above mentioned VVB001 has this capability and we’re using that sensor to show you how you can achieve this.
Prerequisites
To limit the scope of this post, we assume that you already have a few things in place or are familiar with some important concepts of the solution. In particular, this post assumes that you already have a CloudRail account, know how the device management cloud works and have knowledge about our CloudRail edge functions. If not, here are a few good resources to get you started:
- CloudRail Quick Start Guide: https://cloudrail.com/quick-start-guide/
- User Documentation: https://devices.cloudrail.com/documentation
- Guide to Edge Functions: https://devices.cloudrail.com/documentation?service=EdgeComputing#edge1
The first step for following this guide is to connect your vibration sensor to the cloud platform of choice (we’ve so far tested this with Azure IoT Hub and AWS IoT Core) and verify that it is properly sending in data. The frequency setting should be somewhere between 500 ms and 1000 ms otherwise the blob transfer will take forever to complete.
A little theory
The raw data for the vibration sensor is not coming in by default but rather requires a few steps to record and to download the corresponding data blob. The VVB001 allows you to trigger a 4 second recording of raw data with a sampling rate of 25 kHz which produces around 200 kb of raw data. This process requires you to write an edge function that utilizes our ISDU request call. You can find the documentation HERE. Before showing a sample edge function that could be used to send this blob into the cloud, let’s take a look at the different steps required to read the blob.
1/ Checking the status
In order to check if a blob transmission is currently ongoing, the following request can be made to read this status:
|
1 |
makeIsduRequest(49, 0, true, 2, null, (err, res) => {}); |
When the result of the call equals “0000“ there is no BLOB operation in progress at the moment. Any other value indicates that a BLOB operation is already in progress.
2/ Initializing blob recording
To start the BLOB recording and downloading of the sensor, the following request needs to be made:
|
1 |
makeIsduRequest(50, 0, false, 3, "F1F000", (err, res) => {}); |
This request starts the recording and doesn’t provide any response. So, if no error is thrown, you should be good to go. In theory, you could check the status as mentioned above to validate that the recording has started.
3/ Reading blob data
Reading the blob data can be done by executing the following request until the full blob is downloaded:
|
1 |
makeIsduRequest(50, 0, true, 217, null, (err, res) => {}); |
The response to this request starts with one of the following bytes: “1x“, “2x“ or “3x“. The first one can be ignored since it’s only metadata. The second one describes actual data packages which should be extracted to merge them into the BLOB data. The starting byte can and should be removed because it is not part of the data. When receiving a response starting with “3x“, the download is complete and should be closed with the next command.
4/ Completing the blob transmission
To confirm the download, the following command needs to be sent:
|
1 |
makeIsduRequest(50, 0, false, 2, "F2", (err, res) => {}); |
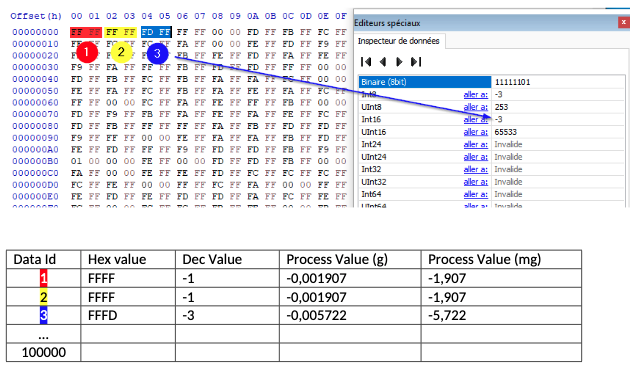
This completes the whole process before it can be triggered again. The blob download is now complete and you’re stuck with a hex encoded chunck of data you still need to interpret. Here is how to convert it: Each raw data has a length of 2 bytes in little endian byte format. The encoded format is a signed integer. For converting the data from the signed integer format to engineering unit (in g), each value must be divided by 524.288. Reference the image below to get a better illustration:
Code sample
The below code sample starts a blob recording an hour after the previous recording completed. This can be adjusted by changing the THRESHOLD property in the code but can be very useful if you want to analyze the raw data every now and then to gain some additional insights. The remainder of the time, the sensor will simply send it’s original payload. Furthermore, the blob data is transmitted in chunks and still needs to be pieced together in the cloud. Nonetheless, this should be a good starting point to get you up and running.
|
1 2 3 4 5 6 7 8 9 10 11 12 13 14 15 16 17 18 19 20 21 22 23 24 25 26 27 28 29 30 31 32 33 34 35 36 37 38 39 40 41 42 43 44 45 46 47 48 49 50 51 52 53 54 55 56 57 58 59 60 61 62 63 64 65 |
const db = require('cr-lowdb'); const THRESHOLD = 1000 * 60 * 60; module.exports = function(event, context, callback) { let data = event[0].payload; let defaultTopic = event[0].topic; if (!db.has(context.deviceKey)) { db.set(context.deviceKey, {lastTransfer: 0, isRunning: false}); } let status = db.get(context.deviceKey); if (status.isRunning) { readBlobPage((err, res) => { if (err) { callback(err); return; } if (res.substring(0,1) === "2") { callback(null, [ { payload: res.substring(2), topic: defaultTopic } ]); } else if (res.substring(0,1) === "3") { completeTransfer((err) => { if (err) { callback(err); return; } status.isRunning = false; status.lastTransfer = Date.now(); db.set(context.deviceKey, status); callback(null, [ { payload: "BLOB transfer completed", topic: defaultTopic } ]); }); } else { callback(null, [ { payload: "BLOB recording in progress", topic: defaultTopic } ]); } }); } else if (Date.now() > status.lastTransfer + THRESHOLD) { startBlobTransfer((err) => { if (err) { callback(err); return; } status.isRunning = true; db.set(context.deviceKey, status); callback(null, [ { payload: "BLOB transfer initiated", topic: defaultTopic } ]); }); } else { callback(null, [ { payload: data, topic: defaultTopic } ]); } } function startBlobTransfer(callback) { makeIsduRequest(50, 0, false, 3, "F1F000", callback); } function readBlobPage(callback) { makeIsduRequest(50, 0, true, 217, null, callback); } function completeTransfer(callback) { makeIsduRequest(50, 0, false, 2, "F2", callback); } |
