
The easiest way to get your sensor data to any MQTT broker
I know… We usually advertise and promote the advantages of sending data into one of the big cloud platforms (AWS, Azure, Alibaba, etc.).
However, we also see that there are legit cases for data to reside in the local network:
- High frequency is required
- The data is so sensitive that you just can’t take any risk
- Persist data and analyze later
In all those cases and probably a few more, you want the data to end up on a local server that runs an MQTT Broker instead of the cloud.
Why I think you still want to use MQTT?
Well, as opposed to HTTP it is an extremely simple and light-weight protocol. HTTP is stateless and thus a new connection needs to be established for every request (communication overhead). MQTT is based on data streams that stay connected once they are established (minimal overhead). This makes MQTT faster for sending data very frequently as is common for IoT use cases.
In addition, it is very easy to have multiple applications consume different sets of data. Each application can simply subscribe to the data points they need. As simple as that…
But, that’s enough introduction. Let’s take a look at how to set up such a broker and how you get your data there.
How to set up an MQTT broker
There are numerous articles and tutorials you can use to accomplish this. Therefore, I believe the best I can do is to list the resources for you.
So, if you are looking for an article that helps to set up a broker:
- [RaspberryPI] Introduction to IoT: Build an MQTT Server Using Raspberry Pi
- [Windows] How to Install The Mosquitto MQTT Broker on Windows
- [Ubuntu] How to Install and Secure the Mosquitto MQTT Messaging Broker on Ubuntu 16.04
- [Mosquitto] https://mosquitto.org/
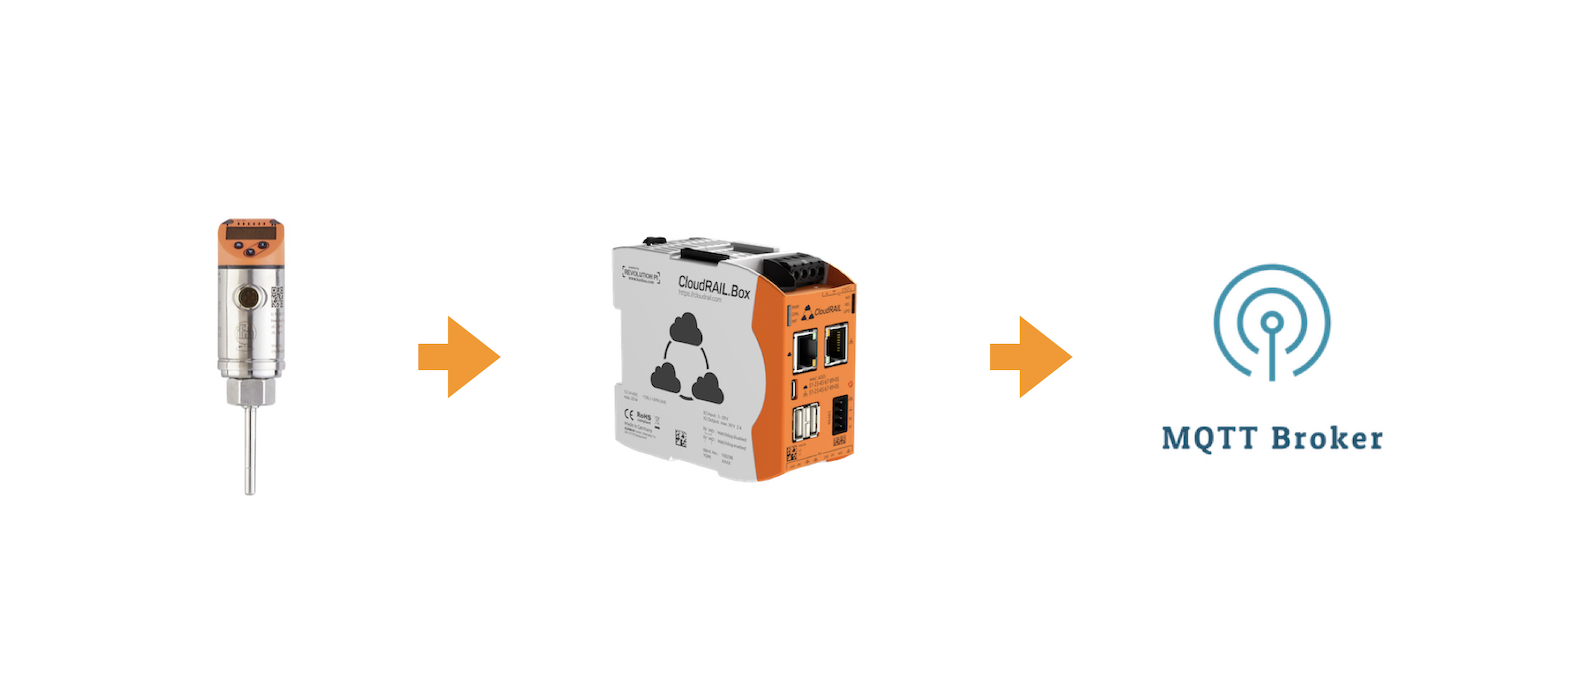
The hardware setup
Now, let’s start to connect everything together!
For this example, I have used the following devices (get a starter kit here):
- One IO-Link temperature sensor
- One IO-Link distance sensor (O5D101)
- An IO-Link master (AL1320)
- Our CloudRail.Box
All these devices are connected together and the CloudRail Box is connected to the internet. In order to make the sensors talk with your MQTT broker, open up our Device Management Cloud.
Configuring the sensor to MQTT connection
Once you are logged in, select the Box you want to configure and press New Connection. You should get a screen similar to this one:
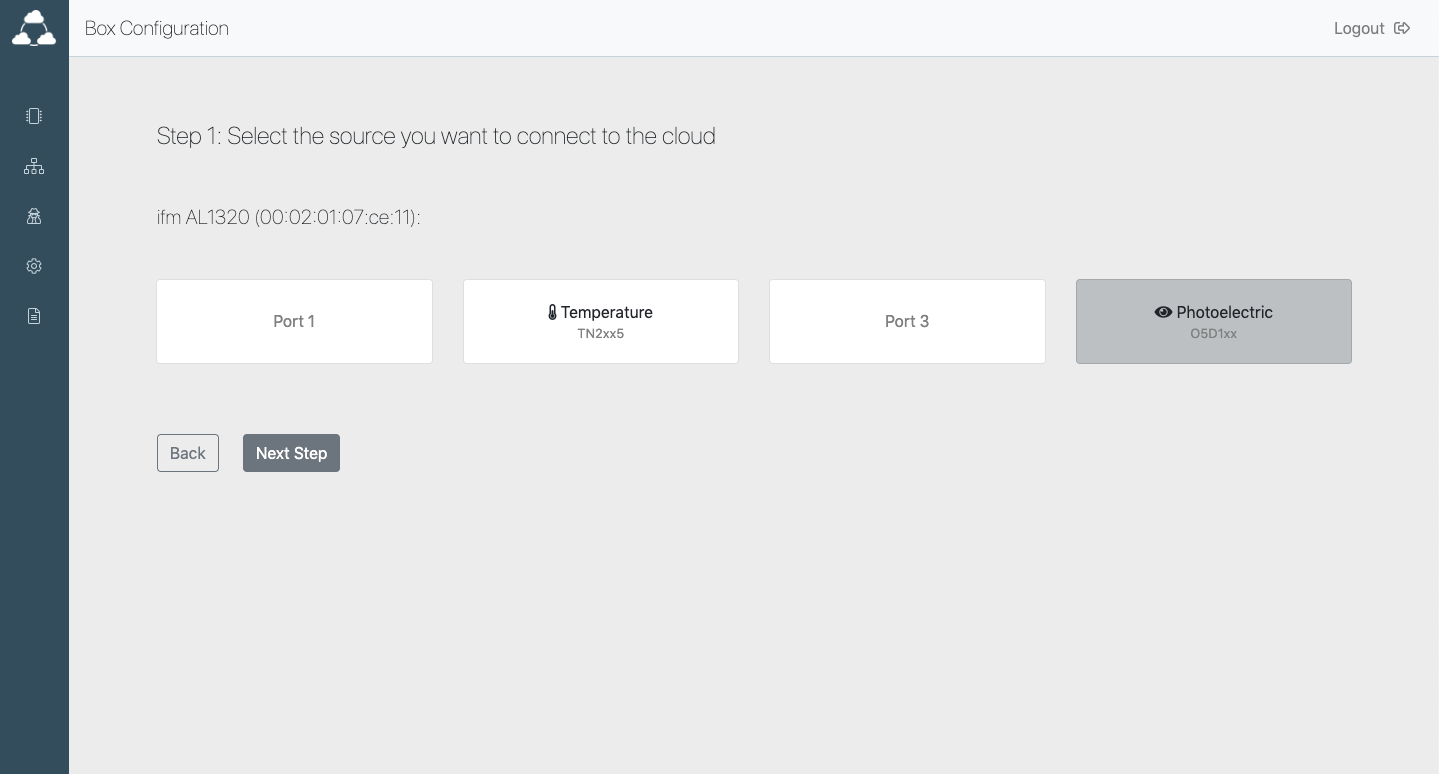
Here you can select the sensor that you want to connect to your MQTT broker first. If you’ve done that, press Next.
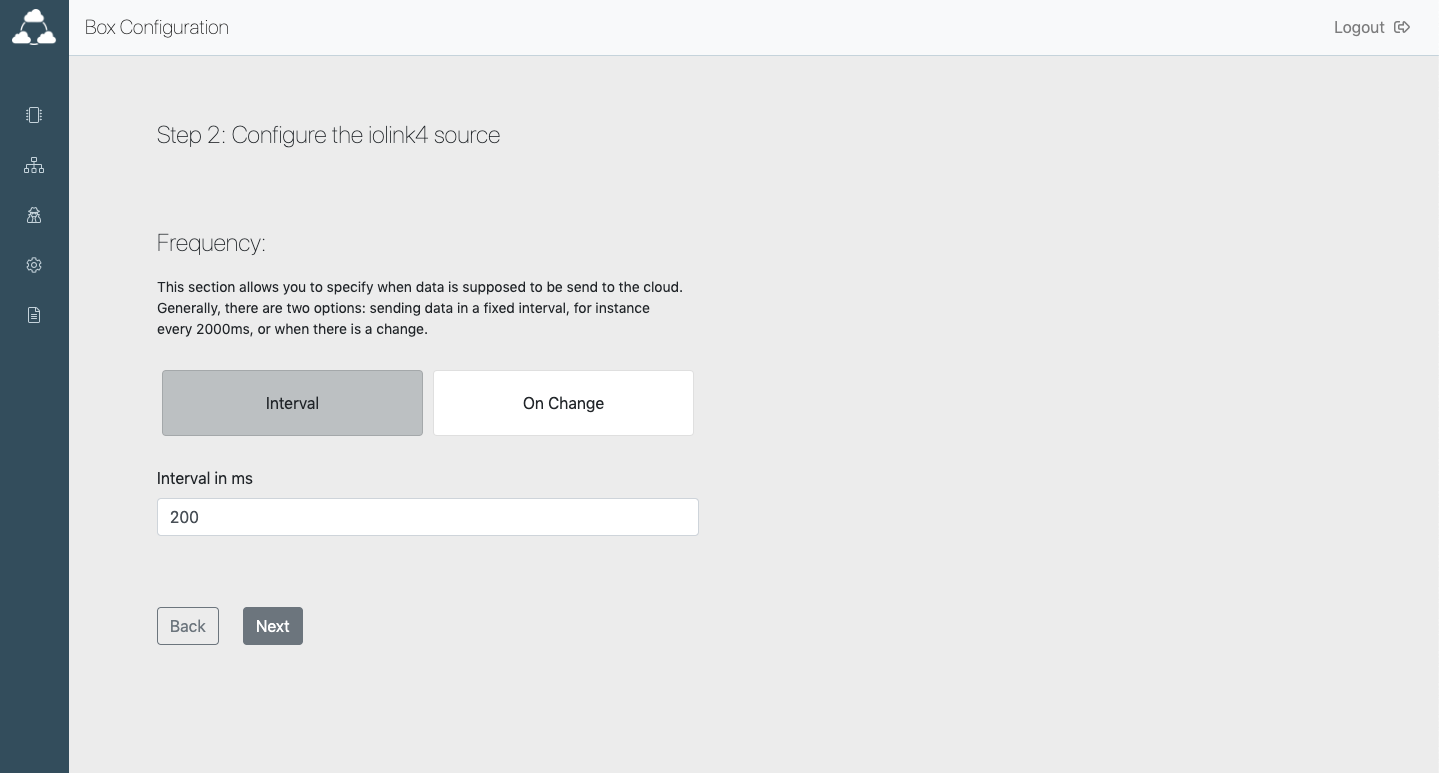
In the next step, you can configure the frequency in which data is sent. You have two choices here: either a fixed interval (e.g. 200ms) or when the value changes by more than X% in any direction. When you made your choice, press Next again.
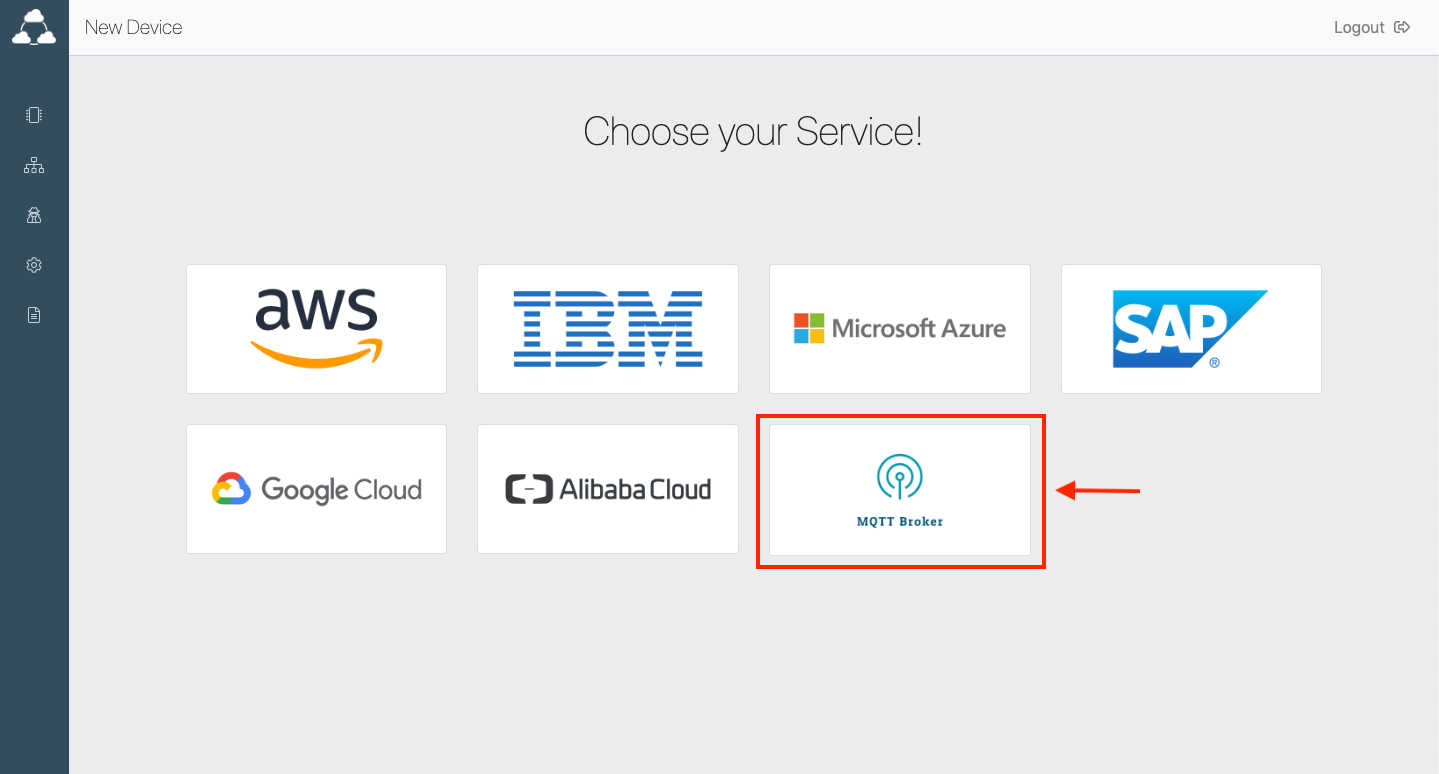
In the image below, choose the MQTT Broker.
We support the three most common ways of authenticating against your Broker:
- No Authentication: Well, I guess there is not much to say about that. If you’re in the local network you might as well choose not to use any authentication since you trust your devices
- Basic Authentication: This is a simple username and password combination
- Certificate Authentication: Probably the most complicated one. This requires you to upload a root (CA) certificate, a device-specific certificate, and the matching private key
You can see the different options in the screenshot below.
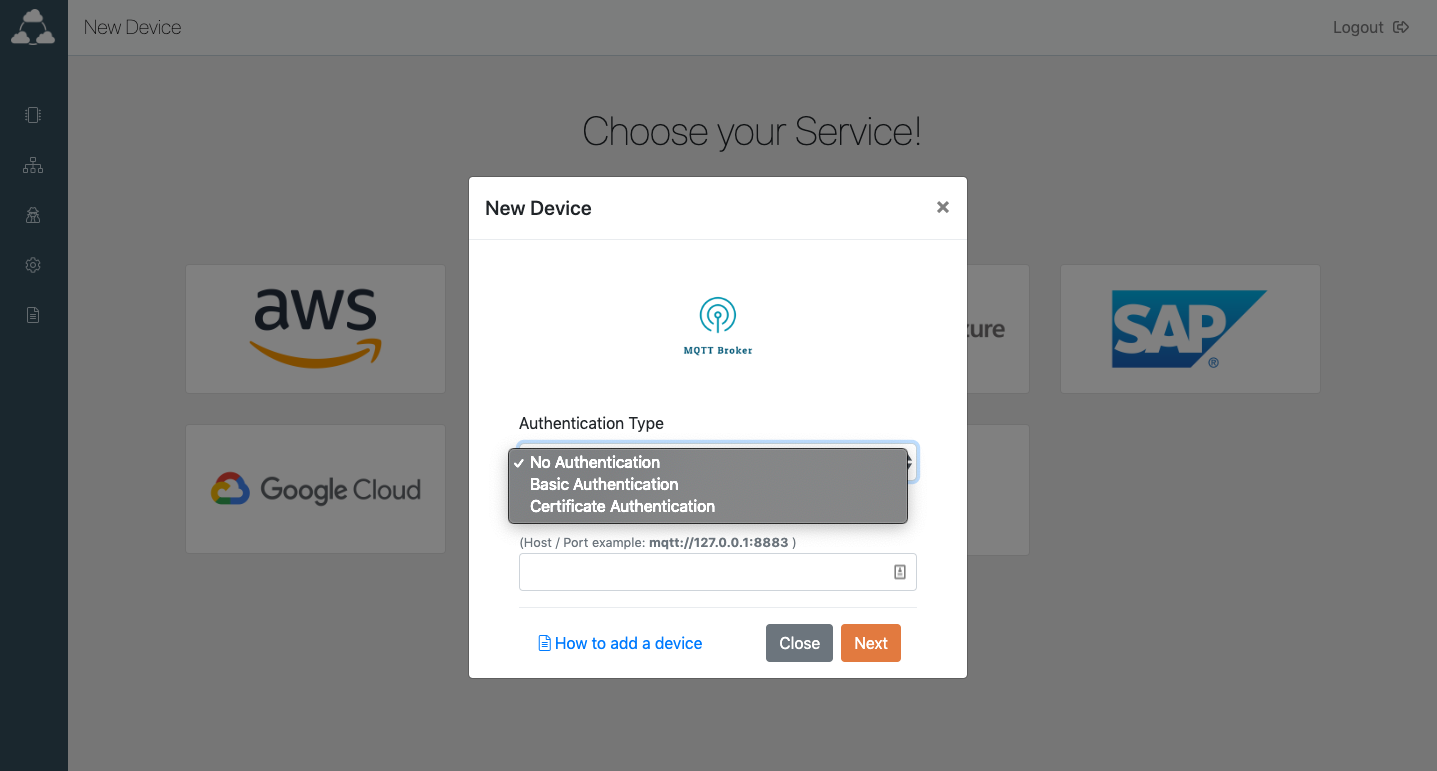
In any case, you’ll have to enter the hostname or IP address for your MQTT Broker. Once this is done, press Next.
As the last step, you can now enter a name for your device. This name is only used within our Management Cloud to identify your device. In case you want to use a custom publish or subscribe topic, you can change them in the Advanced Configuration section.
Now hit the Create button and you are good to go. Your device is now sending data to your MQTT Broker!
I hope you found it as easy as I did to make this work. In case you run into any problems, feel free to reach out to me.

 (7 votes, average: 4.43 out of 5)