
Connect IO-Link Sensors to Aveva Insight
What is AVEVA Insight?
The AVEVA Insight Cloud (former Wonderware) is a unique cloud platform that gives insights into your sensor data on a larger scale. Instead of focusing on just one sensor, you can map your entire operational systems data in one place. This makes it easy to analyze your operational data, add alert systems and be notified through email or push notification. Keep historical data, asset management, easy to search contents, access the data through the cloud, mobile applications or smartwatches and many more features, all bundled in Aveva Insight.
How to connect your sensors to AVEVA Insight?
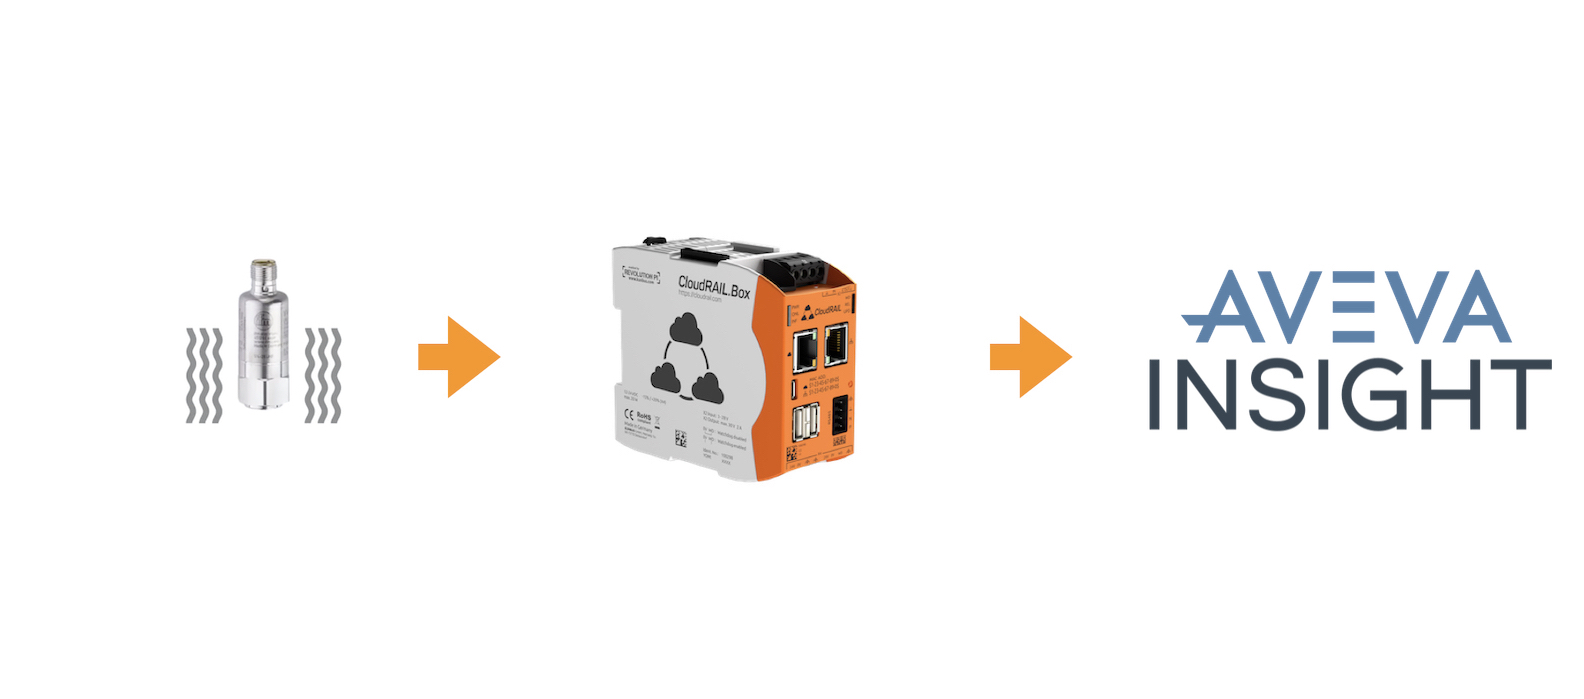
With CloudRail you can quickly connect sensors to any cloud platform and start receiving their data in just a few minutes. Connecting IO-Link sensors to AVEVA Insight couldn’t be easier. In the video above we show you how to do this using our CloudRail.Box. Alternatively, you can read on and find the information below as well. Nonetheless, for anyone new to the system we highly recommend the video since it’s more detailed.
Set up your environment
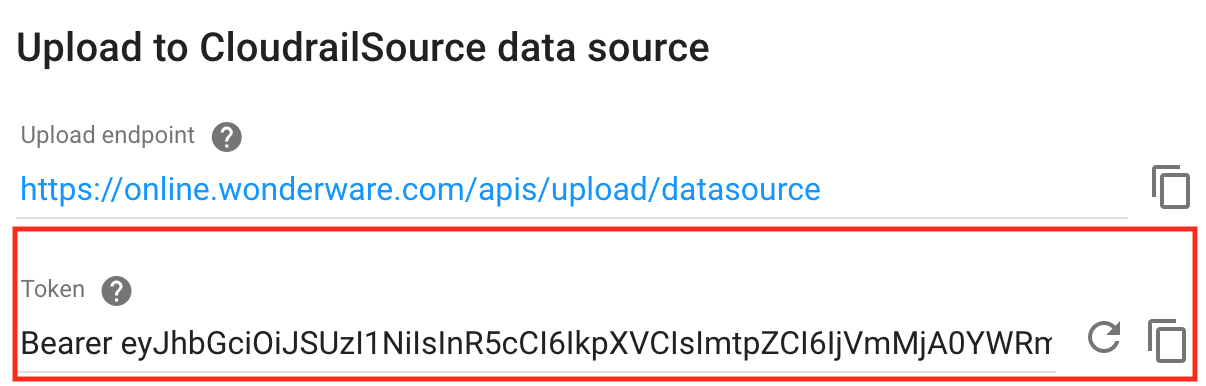
To get started you’ll need an account to our Device Management Cloud as well as an account to the AVEVA Insight platform. After that, you have to create a new Data Source on AVEVA using the Data Source Management. In order to link your account with our Management Cloud, save the generated Data Source Token (reference image below).
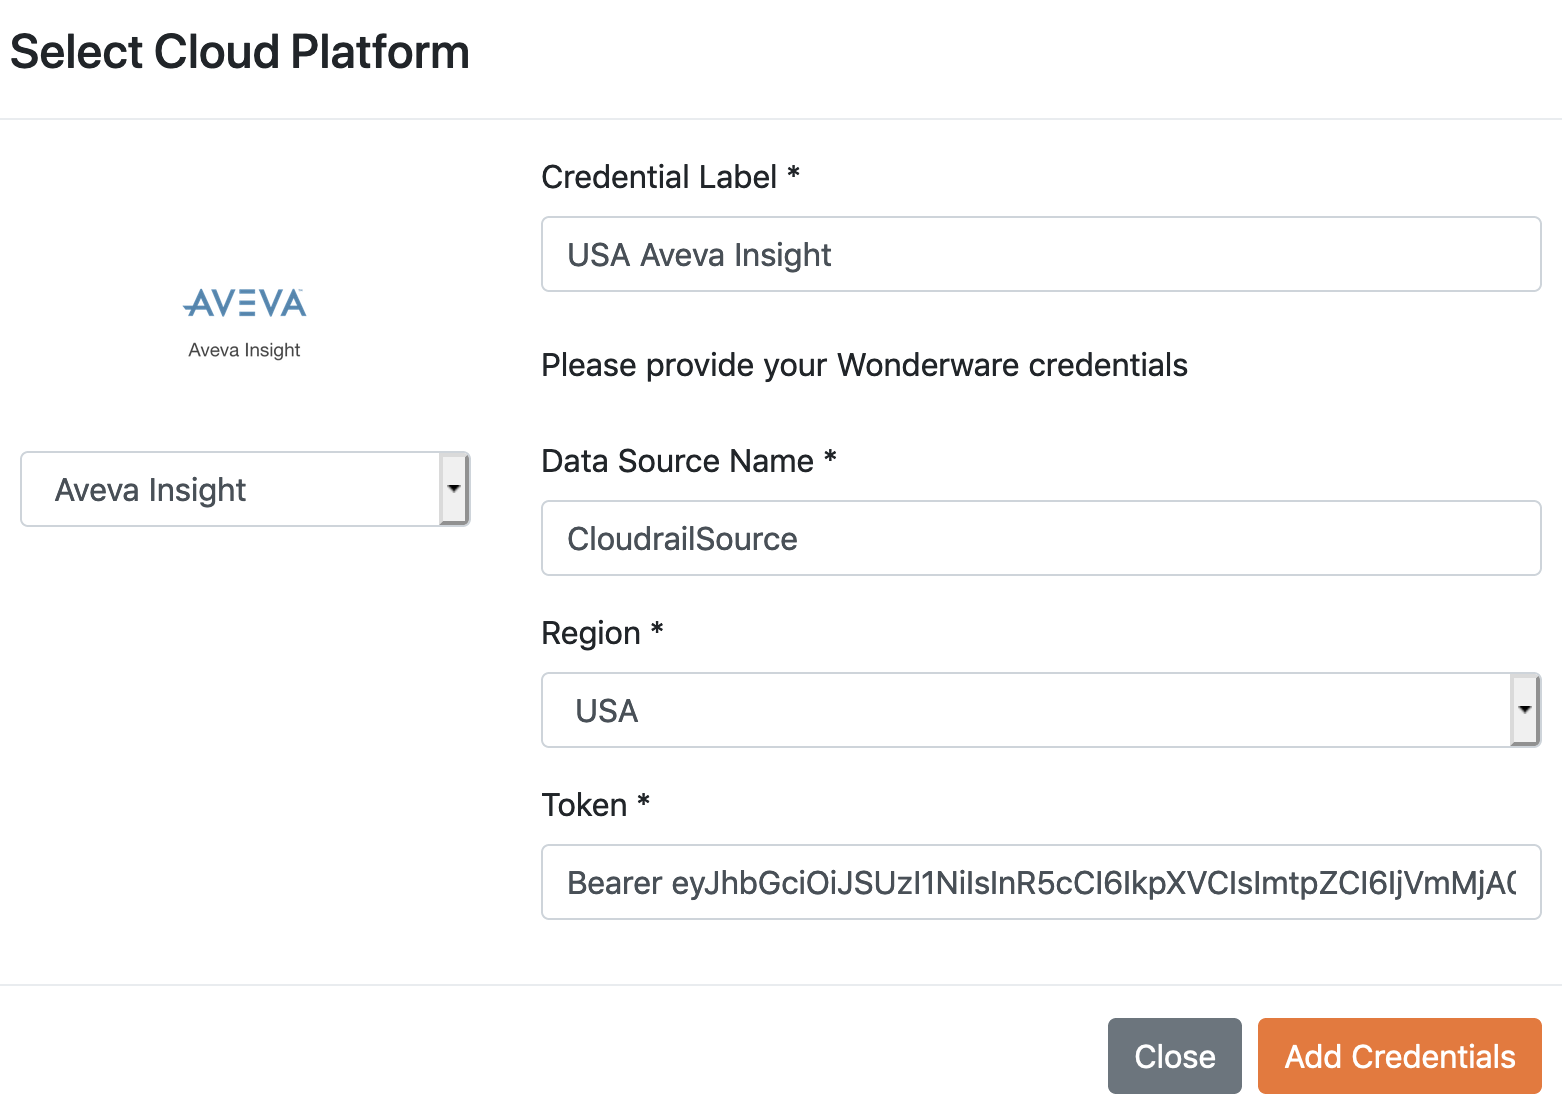
You can now link your AVEVA Data Source with your CloudRail account using the Credentials Manager. If you like, you can also link multiple Data Sources.
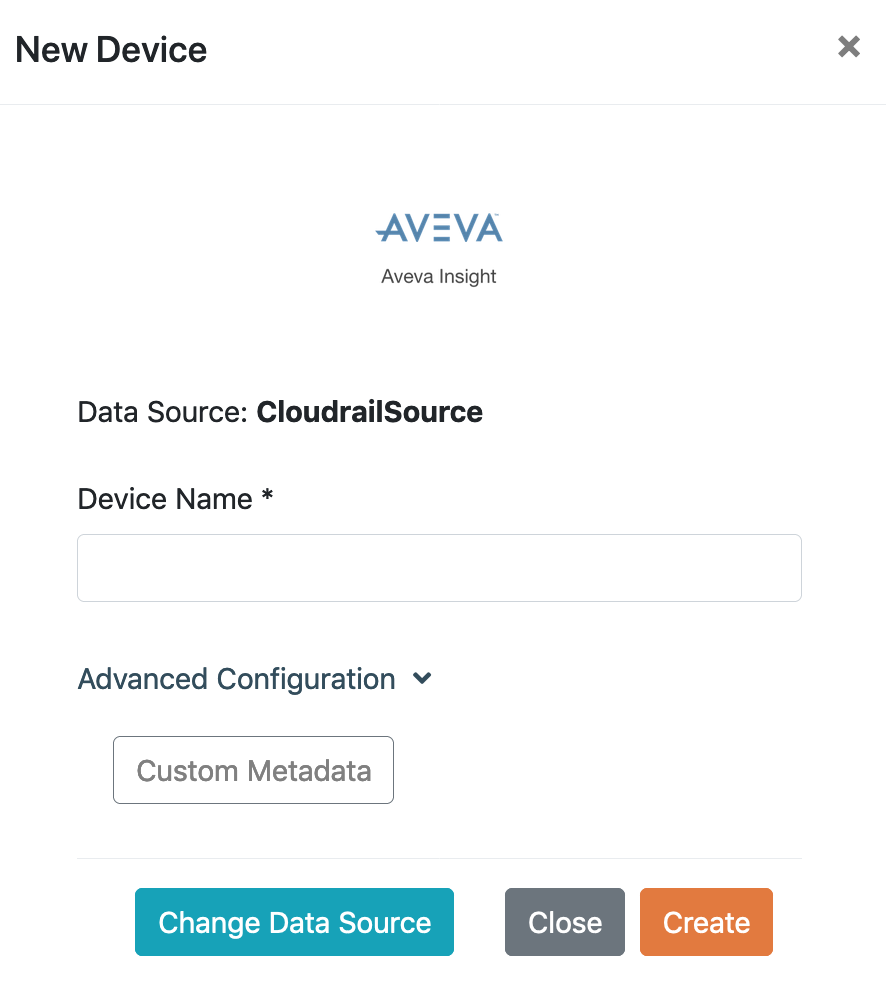
Create a new device
This step is shown in a lot more detail in the video. If you’re already familiar with the steps involved in configuring a sensor/device to send its data into the cloud, the basic process for AVEVA is no different.
However, the data format for AVEVA devices can’t be easily changed after they’re created. That’s why you can do that during the initial configuration using the advanced configuration. This feature allows you to transform your sensor data into meaningful operational data.
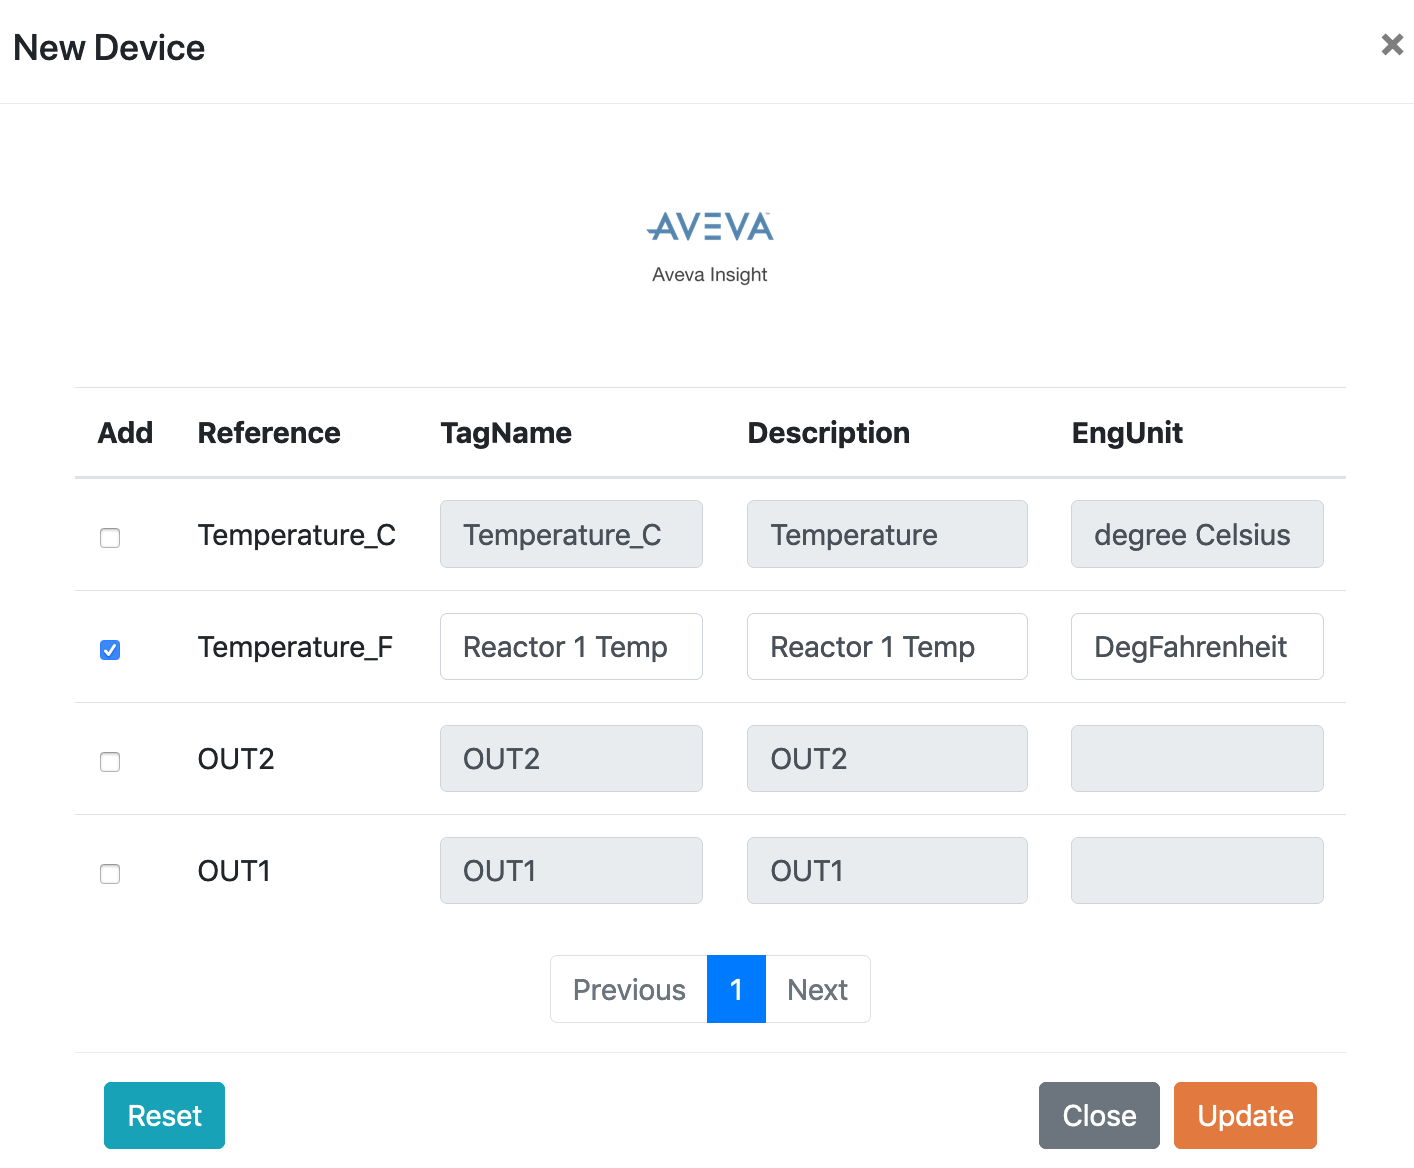
For example we have a temperature sensor which by default sends temperature data as Temperature_C (Celsius) and Temperature_F (Fahrenheit). If you’re in the US, you most likely only want Temperature_F. In case the name Temperature_F doesn’t fit with your naming conventions, you can change the Tag Name and add fahrenheit as an Engineering Unit. This way we know the operations of the sensor and the type of data the sensor is sending.
To do this, in create a new device, press the Custom Metadata button in Advanced Configuration.
Here you can unselect the sensor data that you don’t want and change the TagName, EngUnit, and Description of the data you’ll receive. Example: Temperature_F is now Reactor 1 Temp and EngUnit is DegFahrenheit.
After adding the device, you can search AVEVA Insight and you can see the custom data. How easy was that?

As you can see, it couldn’t be simpler to connect IO-Link sensors to AVEVA Insight using the CloudRail.Box. In addition, you can transform the default sensor data into your format of choice, with very little effort.
If you’d like any more information about how we can help you with the Digital Transformation in your company, reach out to us. We’ll schedule a short “get to know you” call and see if we can help with your challenges.
